Showing posts with label owl. Show all posts

Friday, January 11, 2013

Easy and affordable gallery wall

Pin It


We updated our hallway upstairs with a pretty rug.

Our current wall decor didn't match the rug,
so I started thinking about an easy way to change it.

I came up with this gallery wall using simple black & white pictures of our children.

It was very cheap, fast and easy...

So I will share what I did.
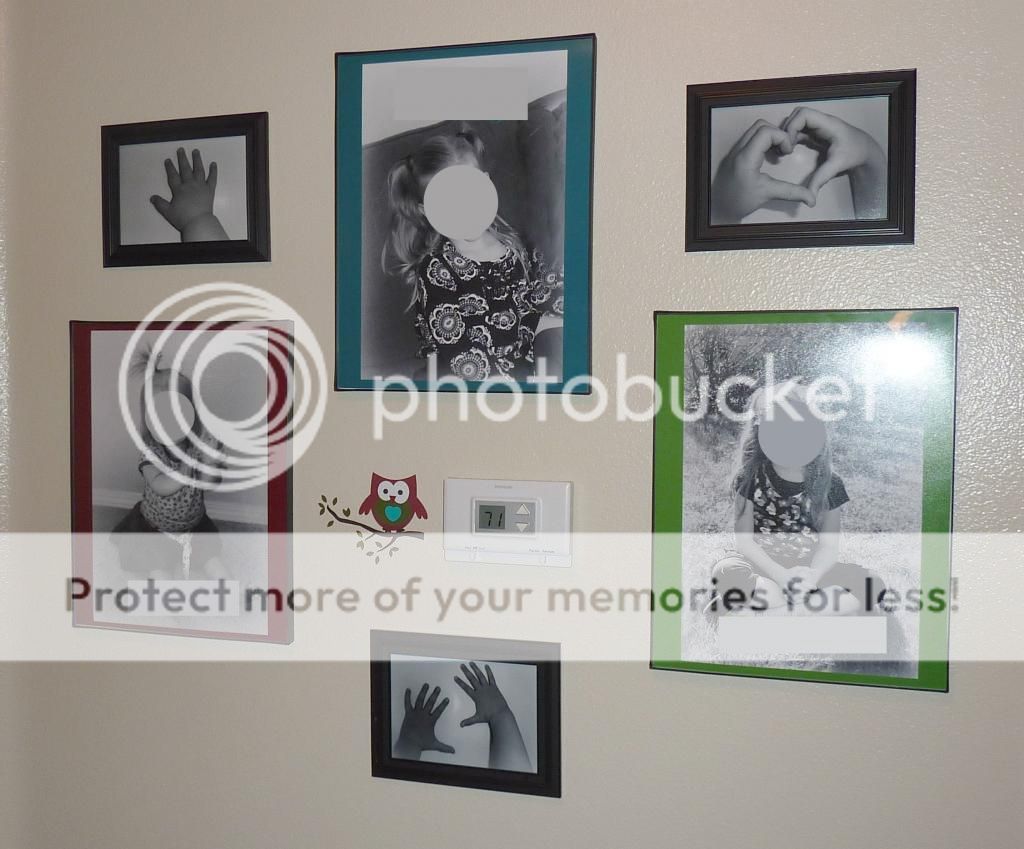


First, I selected some pictures of my girls that I really like.
They were all taken in different settings, and they were wearing different colors,
so I changed the pictures to black and white for a more uniform look.

I also took pictures of their hands.

Then, I got some frames at the $ store:

11 by 14 document frames for the large pictures, and 5 by 7 frames for the small ones.

Since I wanted to add some color,
I used Picasa to do that:


  1. Create a picture collage in Picasa (option: Picture pile)
  2. Pick the right size (for me 11 by 14)
  3. Pick "solid color" for your background and select a color.
  4. Add the picture of your choice: you can drag it to the right position and resize it if necessary.


I saved it and added their names (in the same color as the background) on top of the picture.

Then I just had the whole picture printed. No need to mat the picture, since that is already a part of the picture. 
A very easy way to customize the colors with your decor. 
The added names add to the customized look...

Simple, right?!


I hung the pictures, but something wasn't quite right yet:

I didn't like how everything was centered around the thermostat, so to distract from it, 
I used some vinyl and my Silhouette Cameo to create this little owl.
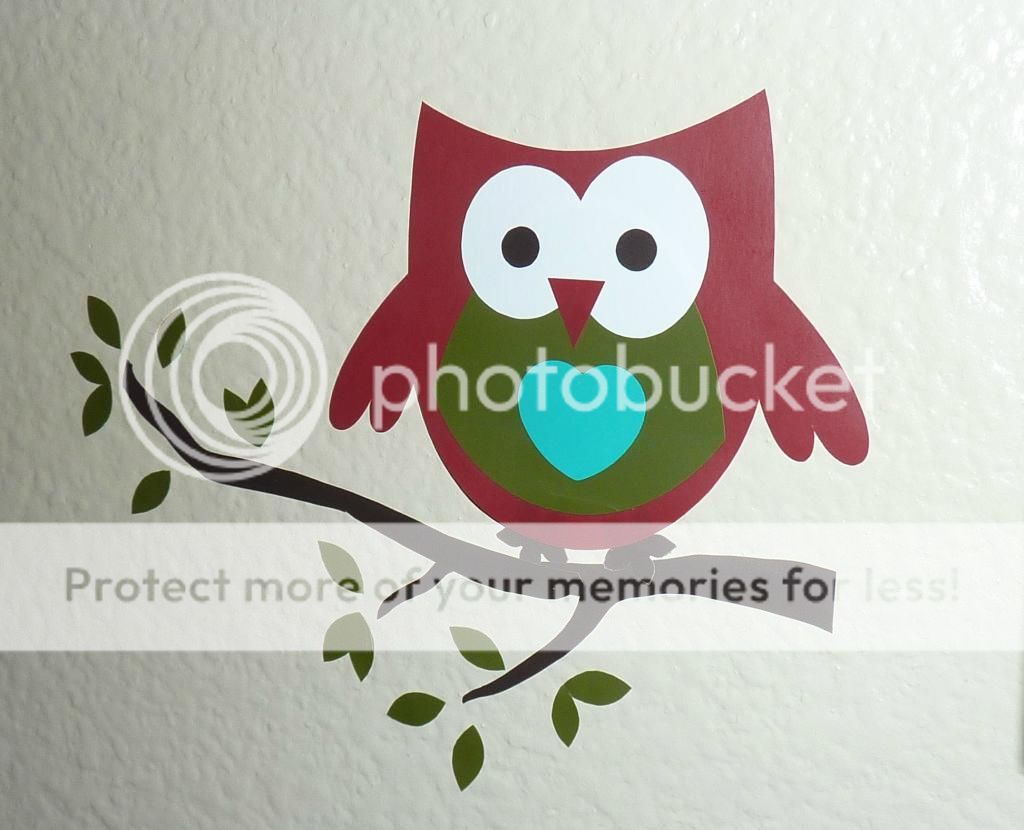


Now the thermostat isn't the center of attention anymore :)

Pin It

Monday, November 12, 2012

DIY Owl Nursery

Pin It


I'm excited to show you the newly decorated nursery of our youngest!


Her room is pretty small, so it was a challenge to use all my ideas,
without making it too crowded.


I bought some owl wall decals quite a while ago, 
intending to use them for her room.

But somehow I never got around to actually putting them to use.


Then, my husbands mom reminded me that she was going to make our daughter a baby quilt.
She has this amazing tradition to make every grandchild a special quilt.
And you should know that she already has 9 grandkids!

Anyway, she always lets us moms give input:
we can pick a pattern, or colors, or theme, whatever...

So I told her I really liked owls, and showed her these owl decals.

She found a neat pattern that I really liked. 
I thought it would be hard to find fabric that would match the owls, 
since there were so many colors.

But we found the neatest fabric line,
matching the colors of the owls,
 and she made the most amazing quilt:


Needless to say I was in awe when we saw it!!!
Our youngest likes the cheerful colors too and likes to play with it :)


I got the leftover pieces so that I could decorate some more,
and I bought extra fabric for some bigger pieces.

And that was the little push in the back I needed to start working on this room...


I really like to use embroidery hoops to display some pieces of pretty fabric.
I also like the way it creates different sized 'dots'.


I used some small scraps to decorate a plain wipe box:


Remember these owls?

They finally got a home in this shelf, 
that I found at the thrift store.

I gave it a fresh layer of paint while I was painting the wall...


Some more close-ups...

I wanted to incorporate a little chevron, 
without it being too overwhelming:


You can find the tutorial to create this chevron picture frame HERE.

And some simple embroidery on one of the embroidery hoops:


I framed the print you can find here.


And I made a pennant banner, to showcase all these pretty fabrics.
I really like banners for kids' rooms,
they are so cheerful!


A matching pillow for the rocker.


A personalized canvas, with an owl, pictures of the fabric, 
and her name (which I took out for privacy purposes).


And, a canvas made with scrapbook paper.


I am happy with the results, it is both cheerful and relaxing at the same time.
I would almost like to trade rooms with her...


I am planning on putting up tutorials on some of the items I made once I have time to do that.


Shared at Sugar Bee Crafts and Sarahndipities.

Pin It

Wednesday, September 19, 2012

Owl Transformation

Pin It

I found this owl at the dollar store (Dollar Tree).
To be honest: I thought it was pretty ugly, but since I am decorating the room of our youngest with owls, I saw some potential. The shape was OK, and there was nothing that a little paint couldn't fix.

Even the cashier had her opinion about them,
mumbling something about "ugly little creatures" when she put them in the bag.
I even bought 3 of them, so I mentioned that I was going to paint them and use them to decorate my daughter's room. 
Not sure what she thought of me :)

Anyway, this is what they turned into after a little bit of TLC:

Three owls that exactly match the new colors and fabrics of her room.
It was pretty simple, and hardly cost anything.
Want to do your own ugly figurine transformation?
All I did was paint the owls with some craft paint (two layers).
Then, I cut some fabric scraps to cover their wings and belly, 
and glued them in place with Mod Podge.
Simple, right?!

Pin It

Sunday, September 9, 2012

Owl always love you - free printable poster

Pin It

I am in the process of redecorating the room of our youngest.

I bought some cute owl stickers over a year ago, I think before she was even born, 
intending to decorate her nursery with them.

They are still in their original packaging...

But recently, I have finally started to work on her room

I will share pictures once it starts to look a little better:
at the moment its half Pooh, half owls, plus a big mess...

In the meantime, I thought I'd share this print I made for her room.

I am planning to print it as an 8 by 10 picture,
so that it fits a standard 8 by 10 frame.

I didn't put my watermark on it,
so that you could use it too, if you want.

And as always:
for PERSONAL use only please!

(The image appears as if there are no borders,
since it blends in with the blog background.
Just double click the picture and you will see
the original print.)

Pin It