I found some cheap turtle necks this weekend at a sale, and decided to buy them and change them into t-shirts for this summer. This is a great time to buy cheap winter clothes and change them, or use winter clothes that you already have on hand before your child outgrows them!
 Next, you are going to cut the new neckline. I used a small plate and traced it. Be careful not to cut it too low, since the weight of the ruffles that you are going to attach will pull it down a little further.
 Next, zigzag the edges of the new sleeves, I used stitch length 1. The sleeves will end up looking 'curly' like they are in the picture.
 Then, use one of the sleeves you cut off, and cut it into strips. My strips were just a little narrower than an inch. You will probably need 3 or 4 strips.
 Next, using a straight stitch, the longest one you have, stitch straight down the middle of the strips. Gather the strips, so that a ruffle is formed. Pin the ruffled strips onto the shirt, so that they overlap one another.
  Sew the ruffle onto the t-shirt with a straight stitch. (I used length 2)
 And the shirt is done!
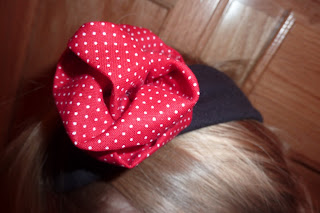
Next, we're going to make this cute headband using the neck of the shirt... (Can't let anything go to waste, can we?!)
 In order to make the flower, find a strip of fabric, about 3 inches wide and 16 inches long. Fold it and sew with the longest straight stitch on your machine. Then, pull the strings at the ends to gather the fabric, as shown in the picture below.


13 comments:
I love this idea!! I have a bunch of old turtlenecks that we no longer wear...what a great idea...why didn't I think of that??
What a great idea...thanks for the tutorial :)
This is brilliant! Thanks for the great idea.
Cindy
sidetrackedartist.blogspot.com
Great idea, great blog. I will follow you!
continue this way, it is good and amazing.
Wow. That is such a fab transformation. What a great idea.
I found your tutorial on craftgossip.com today. And I used it to refashion a long-sleeve shirt that was just begging to be ruffly. Thanks for the tutorial, it turned out great!
http://lifeat-ourhouse.blogspot.com/2010/03/tales-of-newbie-refashionista.html
This is a great idea! I have turned long-sleeved shirts into short-sleeved shirts and ruffled the sleeve edge. However, I have never used a turtleneck. I love the ruffled neck. My daughter is checking right now to see if she has one. :-)
This is great! Watch out turtlenecks here I come and I'm armed with scissors! Finally a way to use all those turtlenecks hiding in my dresser that I don't like to wear. I'm not normally a ruffles kind of girl, but these are just enough. Thanks for the wonderful idea!
Thanks for this fantastic idea!! I greatly dislike turtlenecks, however my daughter got some hand me down ones that are in great shape. I didn't want to waste a perfectly good shirt, and now it'll be cute too! yay!
Just a quick note to let you know that a link to this post will be placed on CraftCrave today [02 Apr 02:00pm GMT]. Thanks, Maria
Hi, I'm Taced from Italy. I find casually your blog and I love this post: great idea!
Thank you for sharing!
I'm a new follower of your blog, if you whant, visit my blog:
http://handmadecreativity.blogspot.com/
My daughter would just about rather go naked that wear a turtleneck, but we sometimes are given one. What a great idea! Yay for wardrobe refashioning.
Hi!! I follow you because I love your blog and it's very inspirating! I have a blog about DIY too. Here's the link if you want to see it. Kisses!! itsmellslikeateenspirit.blogspot.com
Post a Comment