Showing posts with label recipe. Show all posts

Monday, November 4, 2013

Cinnamon Steamed Apples Recipe: Easy and Delicious Side Dish

Pin It


Are you looking for a simple but delicious side dish to complement any meal?
Look no further!

I really enjoy this simple dish.

Ingredients:
Apples (I prefer them a little tart, like Granny Smiths or Jonagold, but you can really use any kind)
Raisins
Cinnamon
Brown Sugar
Water

Begin by washing and coring your apples.

Slice them, about 1/2 inch slices.

Put them in a frying pan with 1/2 cup of water.

Add raisins, cinnamon and brown sugar to taste.
I don't give exact amounts, since it depends how sweet you like your apples to be.

Put a lid on the man, and steam your apples till they are tender. It shouldn't take long, maybe about 5 minutes.


And that's all! Easy enough to eat with an every day meal, but also kind of festive, so it could also be a side dish for your Thanksgiving dinner!

Simple, right?!
Enjoy!

Pin It

Thursday, September 5, 2013

My favorite chicken marinade

Pin It


I love this simple marinade, made of ingredients I usually have on hand.
It tastes great on chicken breasts, chicken legs, whole chicken, you name it.
I have used it for chicken prepared in the oven or on the barbecue.

4 Tbsp. soy sauce
4 Tbsp. olive oil
2 Tbsp. lemon juice
2 Tbsp. brown sugar
3 tsp. garlic, minced or pressed
dash of pepper

  Combine ingredients, marinate chicken in fridge for about 4 hours (I have done it shorter, too, and it still tastes great). 
Then, grill or cook as you would normally do.


Pin It

Friday, February 22, 2013

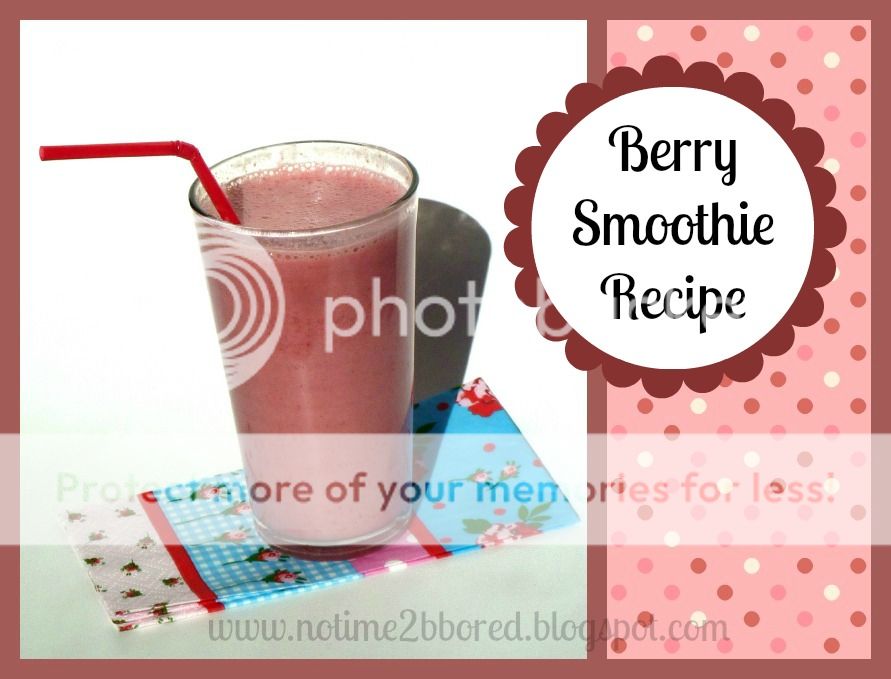
Easy, healthy & delicious berry smoothie

Pin It


I came up with this recipe on one of these days where I felt I needed something fast, easy and healthy.

It makes one serving, as pictured, and I really like it..

Ingredients
* 1/2 cup cranberry juice (100% juice)
* 1/2 cup Greek vanilla yogurt
* 1/2 cup strawberries (I used fresh)
* 1/3 cup raspberries (I used frozen)

Put it all in the blender & blend till smooth.

Enjoy!


Pin It

Wednesday, December 19, 2012

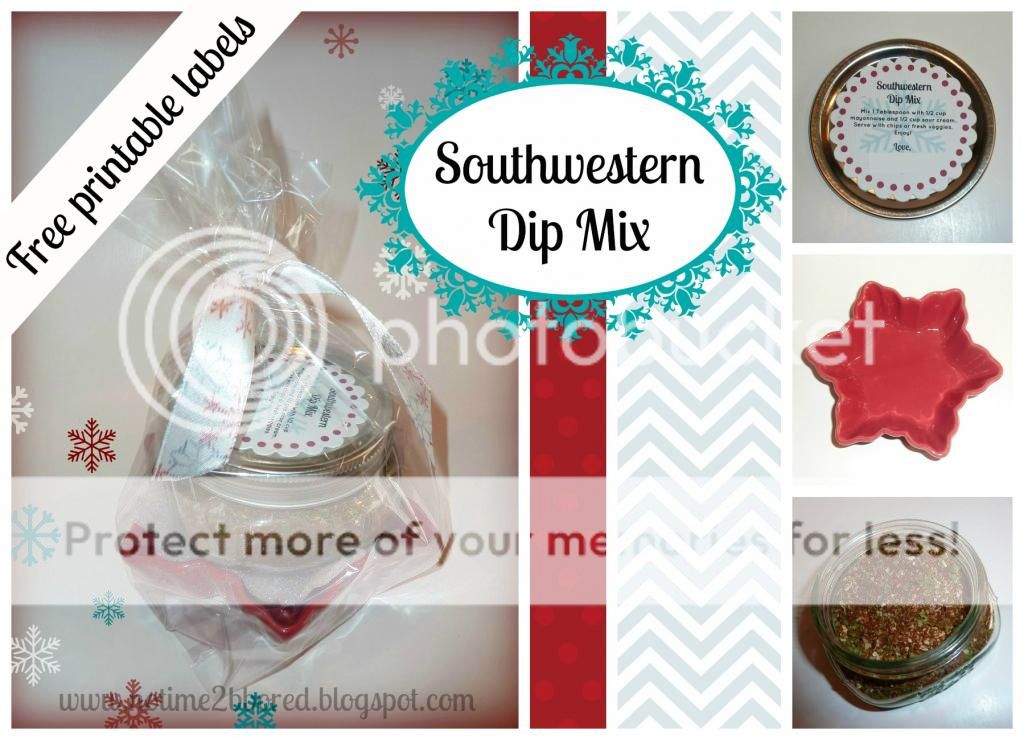
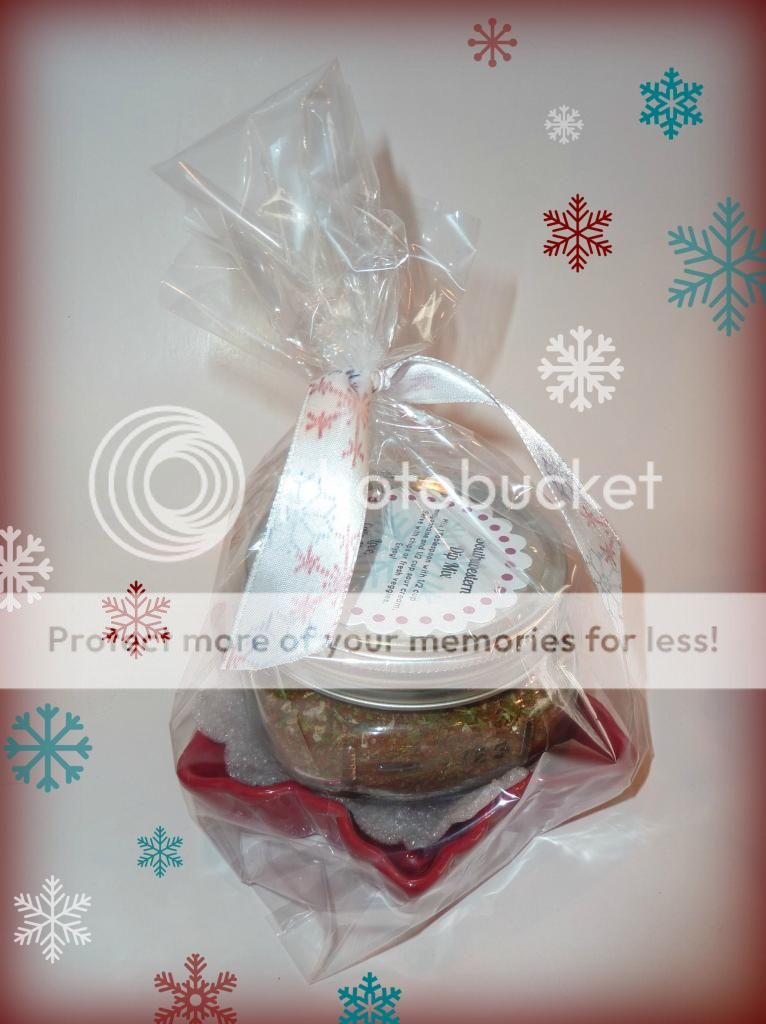
Southwestern Dip Mix Gift - Free printable labels

Pin It

Do you need a last minute handmade gift idea,
that's easy and tasty?

I got one for you!


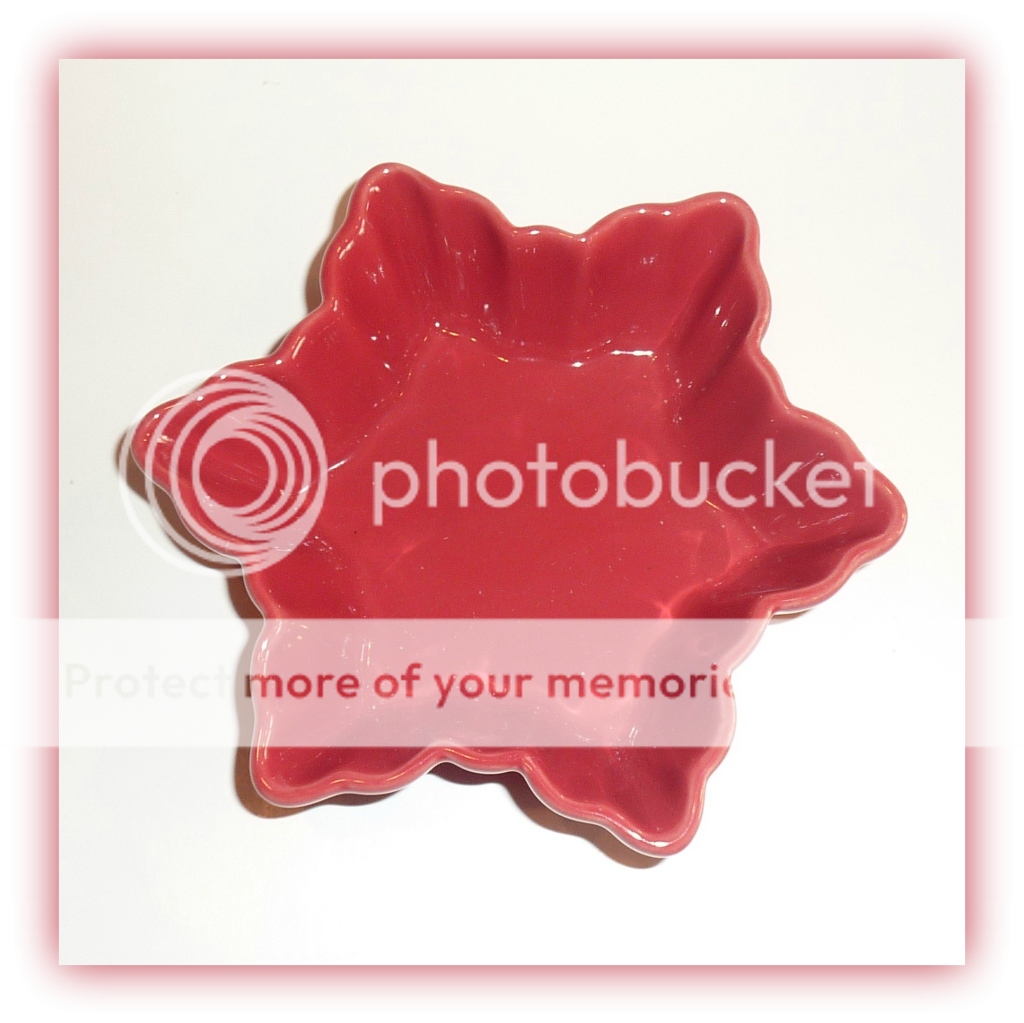
It all started when I spotted these cute dishes at Michaels:

They were too small for baked gifts,
but I thought they were so cute, so I got them anyway.

Then I realized they would be perfect to serve a dip in.

Looking around online, I found a dip that sounded tasty.
So I mixed it up, and I tested it, and I served it to my family.
We all liked it, so I considered it a success.


I mixed up a big batch,
got Ball half pint wide mouth canning jars, 
and filled them with the mix.


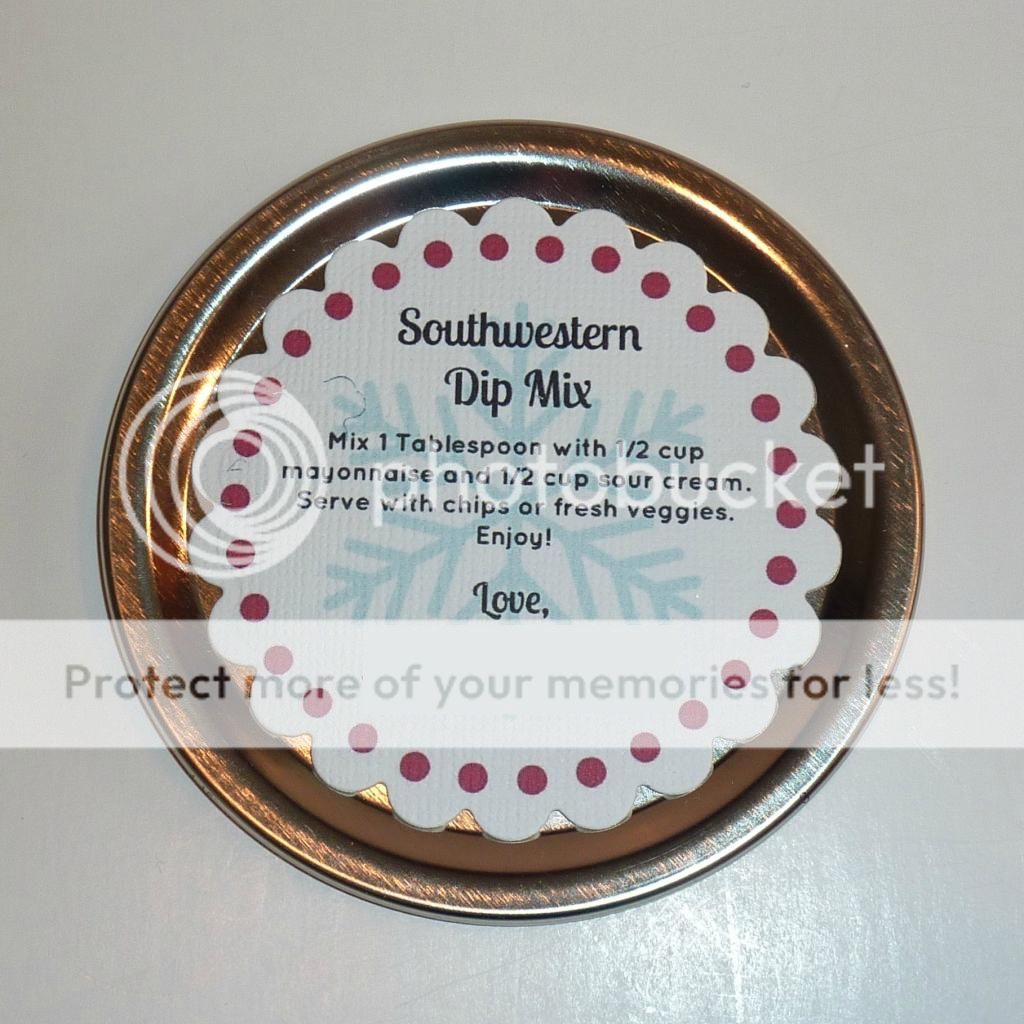
I printed a label with directions and stuck it on top of the jar.


(You mix one tablespoon of the mix with 1/2 cup of sour cream and 1/2 cup of mayonnaise.)


To protect the dish, I cut this shape with my Big Shot,
out of the protective material the cashier at Michaels had wrapped around my dishes.


I put the protective material in between the dish and the jar:


Then, I wrapped it in some clear plastic bags,
and tied it up with ribbon.


And they were ready to be gifted!


In case you want to make your own,
I am sharing the printable labels with the directions on it HERE.


Shared at Tatertots and jello.

Pin It

Friday, October 12, 2012

Crepes Recipe: simple and delicious

Pin It


My kids ALWAYS love to eat crepes, no matter what time of the day it is.
They are easy to make, out of ingredients we usually have on hand. Two important things!

The amount of choices for toppings you can use is endless: 
sometimes we only eat them with some sugar, or jam or syrup,
but you can go all out and use fruit, whipped cream, ice cream, Nutella, or whatever combination you can come up with.

In The Netherlands, where I am from, these are called "pannenkoeken", or "flensjes". 

I usually just guess the quantities, but this time I measured everything and wrote it down, so here is the recipe:


Ingredients (for 16 thin crepes):
1 cup all-purpose flour
1 1/2 cup milk
2 eggs
a dash of salt
butter for baking


Combine the first 4 ingredients in a medium bowl and stir with a whisk till no longer lumpy.

Heat a non-stick frying pan, and put some butter in it (enough to cover the bottom).

Swirl the molten butter around, till bottom is greased.

Add a scoop of batter, and swirl around till the bottom of the pan is covered.
This should be a fairly thin layer.

Lift occasionally to see if the bottom is solid, with small brown speckles, like pictured.

Once the bottom looks like that, you can turn the crepe.
The second side will take less time.

I like to use 2 pans at the same time, to speed up the process.

Enjoy!

And, since I'm blogging this month to raise awareness for Down syndrome:
When I made these today, my youngest daughter, who has Down syndrome, 
and isn't really eating much for 'chunks', had crepes for the first time!
They were just soft enough for her to be able to handle small pieces. 
So I'm excited that this is a new thing she is able to eat.
She can eat pureed foods, cheerios that have been soaked in milk, etc, but tends to spit out anything chunky that we put in her mouth without having something semi-liquid to 'hide' it in. 
I wonder if it's really her being unable to handle it, or plain stubbornness :)


Pin It

Wednesday, August 22, 2012

Easy warm lunch: fried eggs and deli meat - recipe

Pin It


This is one of my favorite warm lunches, 
and fortunately my kids like it, too!

In Holland, where I am originally from,
we like to eat our eggs like this.

You can use deli meats, like ham or turkey, or bacon.

It's very simple:
Put some butter in a frying pan, and heat till it's melted.
 Add a few pieces of lunch meat. Fry till they start to curl. 
Then, break one or more eggs on top. 

(If you're using bacon, you might want to fry it a little longer, 
till it's a little more 'done', and also drain some of the grease.)


Fry till the egg is done, and then just turn it and fry it a little bit longer, till the other side is done, too.

The frying gives the lunch meat more flavor, and a little crunch.

I like to put it on toast or a slice of bread,
but it's also good just by itself.

Enjoy!


Shared at Sugar Bee Crafts.

Pin It

Thursday, June 28, 2012

Homemade Playdough - no cooking required

Pin It


I have been wanting to make some playdough using Kool-aid drink mixes.

So I got 5 cheerfully colored mixes in the store. When I got home, I only had 3...

I looked everywhere, but the two missing ones where nowhere to be seen.

So we just made 3 different colors.

(Of course a few days later I found them: in the fridge, tucked in between some other things I got that day in the store...)


It is simple, and SO fun.

I MUCH prefer the texture over the store-bought version, and my girls just loved the fruity smell of it. 
It's also nice to know all the ingredients.

Ingredients:

1 1/4 cups all-purpose flour
1/4 cup salt
1 Tbsp. Cream of tartar
1 cup boiling water
1 1/2 Tbsp. oil
 Several packages Kool-Aid Unsweetened Drink Mix

In a large bowl, mix the dry ingredients.
Then, carefully add the boiling water and the oil.

Stir well with a fork, and once it has cooled down (which is pretty fast), knead it well.

Divide the dough in as many portions as the number of colors you want to make.

Add Kool-aid little by little to each portion and knead, till you made the desired color.

This last step is something that my girls really enjoyed.

This made a pretty good batch, we were able to fill six containers:
(I only pictured 3 here)


I used empty baby food containers, 
and put some Wrap&Seal over it too keep it air tight.

It seems to work well to keep the dough soft.

I will definitely try this again!

My kids had fun playing with this, and I thought it would also make a cute party favor or small handmade gift.

I linked up with Craft-o-maniac.


Pin It

Monday, June 4, 2012

Cherry Cheesecake Brownies

Pin It


If you like cherries, cheesecake and brownies, 
this is the perfect dessert for you.

I tried the recipe HERE.

It's simple and really good...

Pin It

Wednesday, May 2, 2012

Raspberry Muffin Recipe

Pin It


A while ago I came up with this recipe, and it became a favorite in our house.

It's simple, and made out of ingredients we have on hand most of the time, since I usually have frozen fruit in the freezer. 
I like to use raspberries, but you could also substitute for other berries.


Here is the recipe, and below is a printable version, too

Raspberry Muffin Recipe

Yields: 12 raspberry muffins

                                                  Ingredients:


2 cups all purpose flour
¾ cup plus 2 Tablespoons sugar (divided)
3 teaspoons baking powder
½ teaspoon salt
1 egg
1 cup milk
¼ cup vegetable oil
1 cup raspberries, fresh or frozen
1 teaspoon cinnamon


Preheat oven at 400 F. Put liners in muffin tin.

Mix flour, ¾ cup of sugar, baking powder and salt in a large bowl. In a smaller bowl, mix the egg, milk and oil. Add the mixture to the large bowl, and mix, until moist. (Batter will still be lumpy.) Fold in raspberries. Divide the batter between 12 lined muffin pan cups, I like using an ice cream scoop for that.
Mix 2 Tablespoons of sugar with 1 teaspoon of cinnamon in a small bowl, and sprinkle on top of the muffins.

Bake for 25 minutes, or until muffins are golden.

Enjoy!


(just click the picture and print from your browser)


Pin It

Saturday, December 17, 2011

Peppermint Crunch Brownies - super easy recipe

Pin It


I just made these super simple brownies.
I am pretty much out of groceries, and needed to make something for a little x-mas party for the kids. 
I know, bad planning...

I happened to have brownie mix and candy canes on hand.

It doesn't get any simpler, but it tastes great.

Just prepare the brownie batter according to package instructions.

Crunch some candy canes with a rolling pin in a Ziploc bag.

Sprinkle half of the crunched candy canes on top of the brownie before putting it in the oven, and bake as normal.

It will melt and kind of soak into the brownie.

Then, take it out, and sprinkle the remaining candy cane  pieces on top of it, and put it back in the oven for a minute.


Enjoy!


Shared at Sugar Bee Crafts.

Pin It

Saturday, August 7, 2010

Fresh Salsa Recipe

Pin It

One of my favorite summer recipes:
Fresh Salsa!

If you have a lot of tomatoes from your garden,
this is a great way to use them.

It is so simple to make, and healthy and delicious.

You need the following ingredients.
Usually I get most ingredients from my garden,
unfortunately this summer I had to buy a few of them
But it is still very tasty!

The amount of ingredients is just a matter of taste,
so I will just list the ingredients, no exact quantities.

  • Tomatoes
  • Onions
  • Jalapenos
  • Cilantro
  • Lemon juice (just a little bit)
  • Salt
  • Pepper

Just chop your ingredients, mix in a bowl,
add some lemon juice and salt & pepper to taste,
and enjoy with chips or your favorite Mexican dish.

Pin It

Thursday, July 22, 2010

Fresh Strawberry Jam

Pin It

I always thought making jam was very difficult and time consuming.
Then I learned about freezer jam. It's quick and simple and I love it!

We made a load of freezer jam.
It's so simple. I used Ball instant fruit pectin, strawberries and sugar.

I used my blender to crush the strawberries and followed the directions on the package.

Now we have our favorite jam for the months to come!

Pin It

Thursday, July 8, 2010

Ice cream cake with graham cracker crust

Pin It


At our house this is a favorite for summer birthdays:

an ice cream cake with graham cracker crust.

I love it too, it is easy, and if you use your favorite ice cream flavors, it's pretty much impossible to mess it up :)


Ingredients:

· 11 whole graham crackers

· 3 tablespoons sugar

· 1 stick butter

· 2 boxes of ice cream, soft

· 1 box whipped topping (defrosted ahead of time)

· Chocolate syrup/caramel syrup/nuts/crushed chocolate chips/etc. for decorating

Preheat the oven at 350 F. Crush the graham crackers in a Ziplock bag with a rolling pin. Melt the stick of butter in the microwave in a medium bowl. Put the graham cracker crumbs and sugar in the bowl and mix.

Put in the bottom of a springform pan, (I use my largest, diameter about 10.5 inches) and press. Bake at 350 for 12 minutes.

Let the crust cool down and let the ice melt (shouldn’t be liquid, just soft). Scoop the 2 layers of ice cream in on the crust, starting at the edges and fill in. Press so make sure it is compacted. Spread whipped topping on top of the cake and decorate. Cover with saran wrap and freeze.

Take the cake out of the freezer just before serving. Let it sit on the counter for a few minutes, and then the springform should come right off.

Enjoy!

Pin It

Wednesday, May 26, 2010

Fruity Shake Recipe

Pin It


This is my favorite way to add something healthy to our lunches! And, it is super easy (and quick) to make this fruity shake.

I usually start with fruits, like bananas, strawberries, blueberries, whatever I have on hand. Frozen berries work really well, too. Then I add milk, and sometimes yogurt. Turn the blender on for a minute or so, and you're done. I usually take a spoon to see if I like the taste. Sometimes I add some more of an ingredient.

My kids love this, and so do I, and I know I am feeding them fruits, milk and yogurt at the same time. Bonus: works great for slow eaters too!

Pin It

Thursday, March 18, 2010

Pineapple Orange Smoothie

Pin It

I really enjoy this drink, it's so simple, I just made it up last week, but am sure this is going to be one of my summer favorites this year. My kids like it, too! Can you tell I am ready for a change of seasons??
INGREDIENTS
  • 20 oz can of pineapple (in 100% juice)
  • 2 cups of ice cubes
  • 2 cups of orange juice

Put all ingredients in the blender.

Cover and process for 15 seconds or until smooth.

Enjoy!

(Variation: you could add a banana too, for extra vitamins, flavor and sweetness...)

Pin It