Thursday, November 22, 2012
Wednesday, November 21, 2012
Handmade gift ideas - 15 DIY tutorials
The holidays are getting closer,
but there is still enough time to create some handmade gifts.
Here is a list of some handmade gift ideas,
including links to their tutorials.
For the little ones:
Edible gifts:
For the girls or ladies in your life:
Enjoy!
Wednesday, November 14, 2012
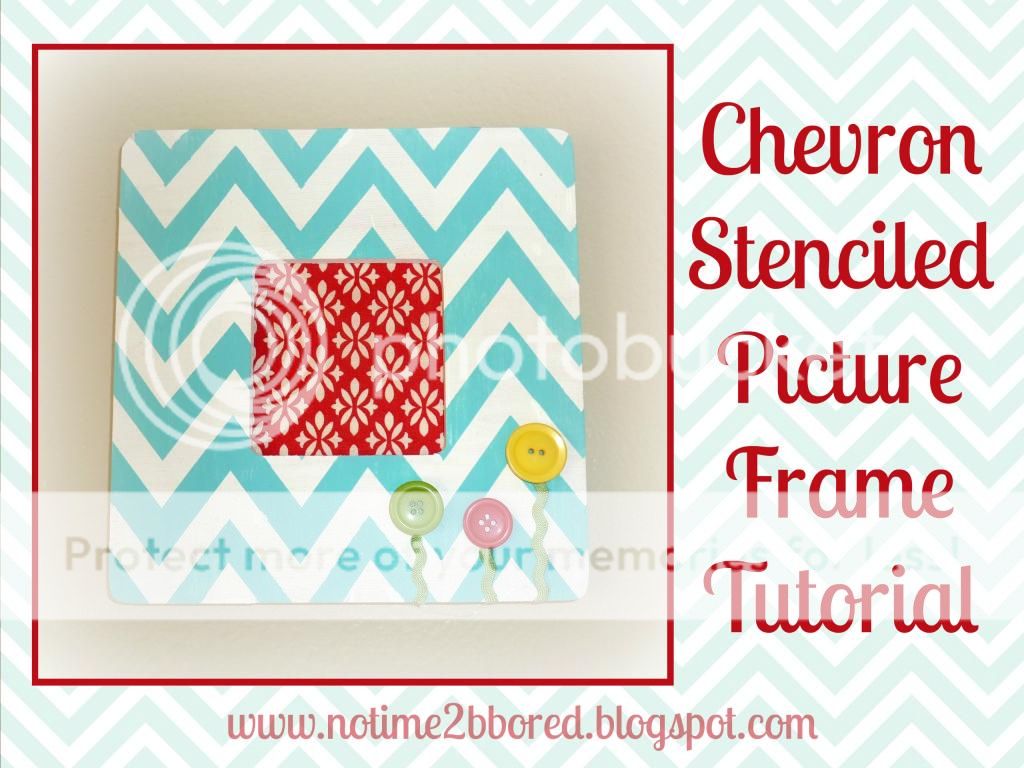
Chevron Stenciled Picture Frame Tutorial
Here is an easy way to decorate a cheap $1 craft picture frame.
I found this one at Michaels a while ago.
Fun to decorate your home, or to give as an unique handmade gift...
You will need the following materials:
* Picture Frame
* Contact Paper/ Shelf Liner ($store)
* Scissors or cutting machine to cut template
* Craft Paint in 2 colors
*Mod Podge
* Foam Paint Brushes
* Optional: Button/ribbons/fabric to decorate, and glue gun
Start by painting it in the lightest color and let it dry.
(I painted it plain white, just paint the whole thing.)
Then, cut your template out of contact paper.
I used my Silhouette Cameo to cut a chevron template,
but you can also easily cut one by hand:
 |
| 1 & 2: Fold paper accordion style 3: Cut under an angle 4: Unfold to reveal chevron template |
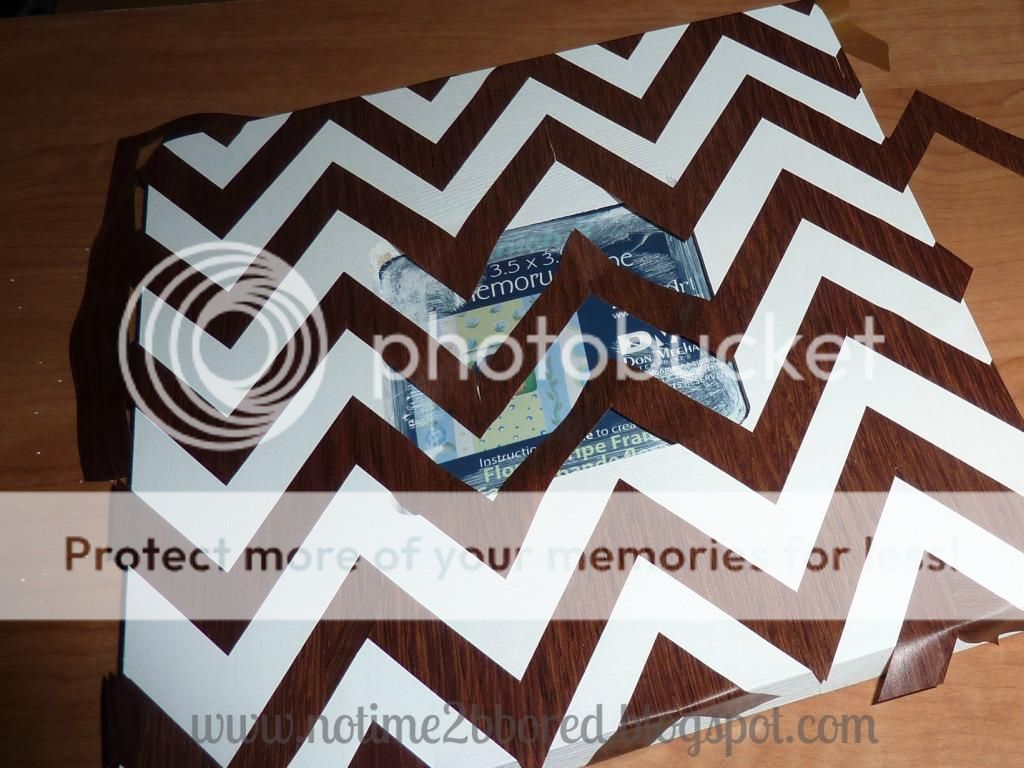
Apply the contact paper chevron template to your frame as pictured below:
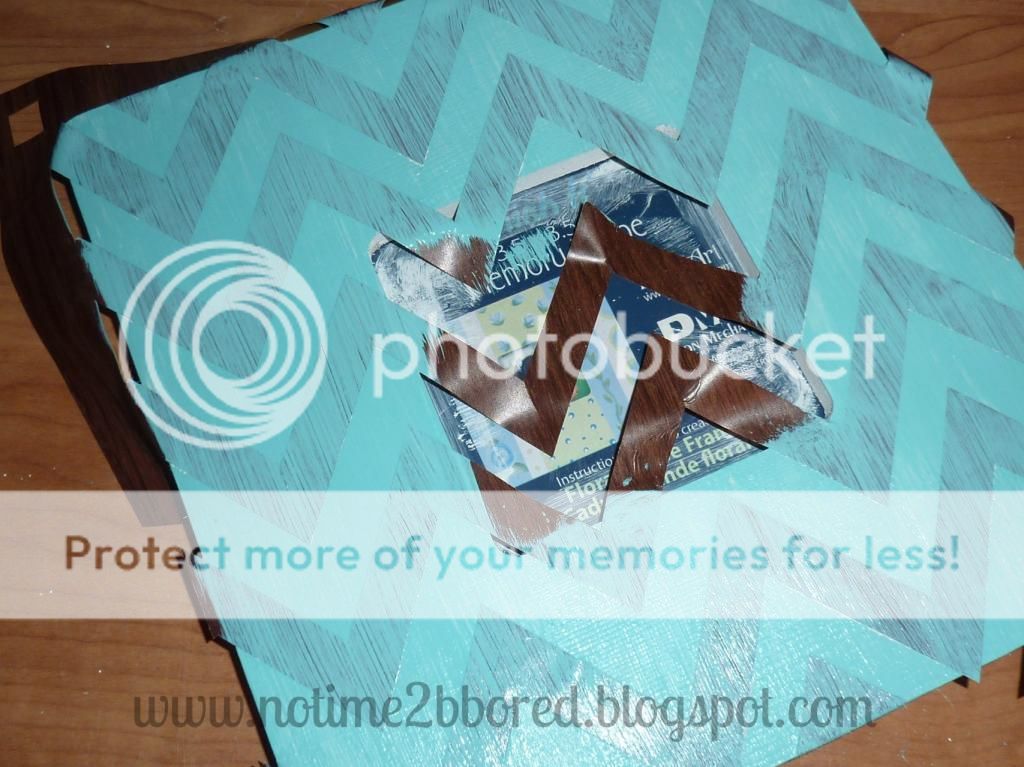
Next, 'paint' over the whole thing with Mod Podge.
This will keep the next color of paint from bleeding under the template.
After the Mod Podge layer has dried,
paint your second color. (In this case, aqua.)
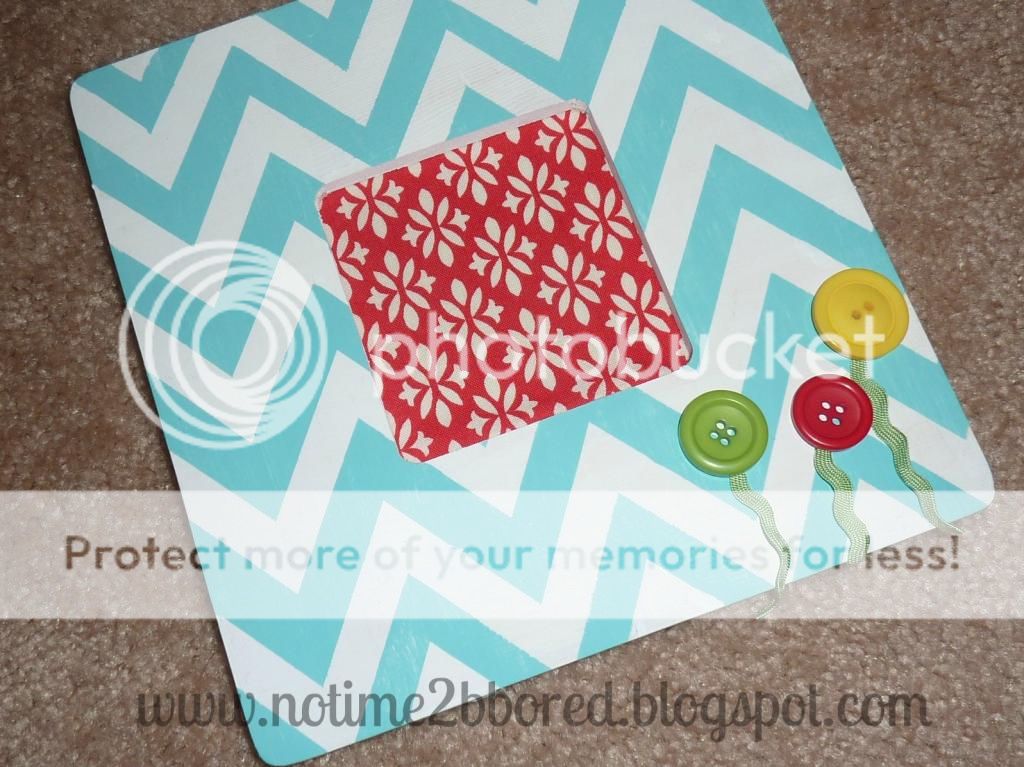
Let dry again, and peel away the contact paper to reveal your chevron pattern:
Now, you can leave it like it is,
or decorate it with buttons, ribbon, etc, whatever you like.
I used some buttons and ribbon to create some flowers,
and glued them in place with a hot glue gun.
Shared at Thirty Handmade Days, Tatertots and Jello, Brassy Apple, Sugar Bee Crafts, Craft-o-maniac and Somewhat Simple.
Monday, November 12, 2012
DIY Owl Nursery
I'm excited to show you the newly decorated nursery of our youngest!
Her room is pretty small, so it was a challenge to use all my ideas,
without making it too crowded.
I bought some owl wall decals quite a while ago,
intending to use them for her room.
But somehow I never got around to actually putting them to use.
Then, my husbands mom reminded me that she was going to make our daughter a baby quilt.
She has this amazing tradition to make every grandchild a special quilt.
And you should know that she already has 9 grandkids!
Anyway, she always lets us moms give input:
we can pick a pattern, or colors, or theme, whatever...
So I told her I really liked owls, and showed her these owl decals.
She found a neat pattern that I really liked.
I thought it would be hard to find fabric that would match the owls,
since there were so many colors.
But we found the neatest fabric line,
matching the colors of the owls,
and she made the most amazing quilt:

Needless to say I was in awe when we saw it!!!
Our youngest likes the cheerful colors too and likes to play with it :)
I got the leftover pieces so that I could decorate some more,
and I bought extra fabric for some bigger pieces.
And that was the little push in the back I needed to start working on this room...
And that was the little push in the back I needed to start working on this room...
I really like to use embroidery hoops to display some pieces of pretty fabric.
I also like the way it creates different sized 'dots'.
I used some small scraps to decorate a plain wipe box:
Remember these owls?
They finally got a home in this shelf,
that I found at the thrift store.
I gave it a fresh layer of paint while I was painting the wall...
Some more close-ups...
I wanted to incorporate a little chevron,
without it being too overwhelming:
You can find the tutorial to create this chevron picture frame HERE.
And some simple embroidery on one of the embroidery hoops:
I framed the print you can find here.
And I made a pennant banner, to showcase all these pretty fabrics.
I really like banners for kids' rooms,
they are so cheerful!
A matching pillow for the rocker.
A personalized canvas, with an owl, pictures of the fabric,
and her name (which I took out for privacy purposes).
And, a canvas made with scrapbook paper.
I am happy with the results, it is both cheerful and relaxing at the same time.
I would almost like to trade rooms with her...
I am planning on putting up tutorials on some of the items I made once I have time to do that.
Shared at Sugar Bee Crafts and Sarahndipities.
Thursday, November 8, 2012
Subscribe to:
Posts (Atom)


