Showing posts with label party time. Show all posts

Saturday, July 13, 2013

Free Printable Birthday Bubble Wrappers

Pin It

Bubbles make a great party favor for summer birthdays.


These wrappers fit around a standard size bottle of bubbles.

After I printed them, I just cut them, glued them around the bottle,
and then I covered the labels with clear packing tape to make them water-proof.


Today I am sharing these free printable wrappers with you!


Go HERE to download the free printable PDF-file.

Pin It

Wednesday, July 3, 2013

Red, white and blue flowers and pinwheels

Pin It

I have a ton of pictures on my computer of things I made in the past weeks (or months even).

Just not much time to post them.

But thought I'd share a couple things I made this week...


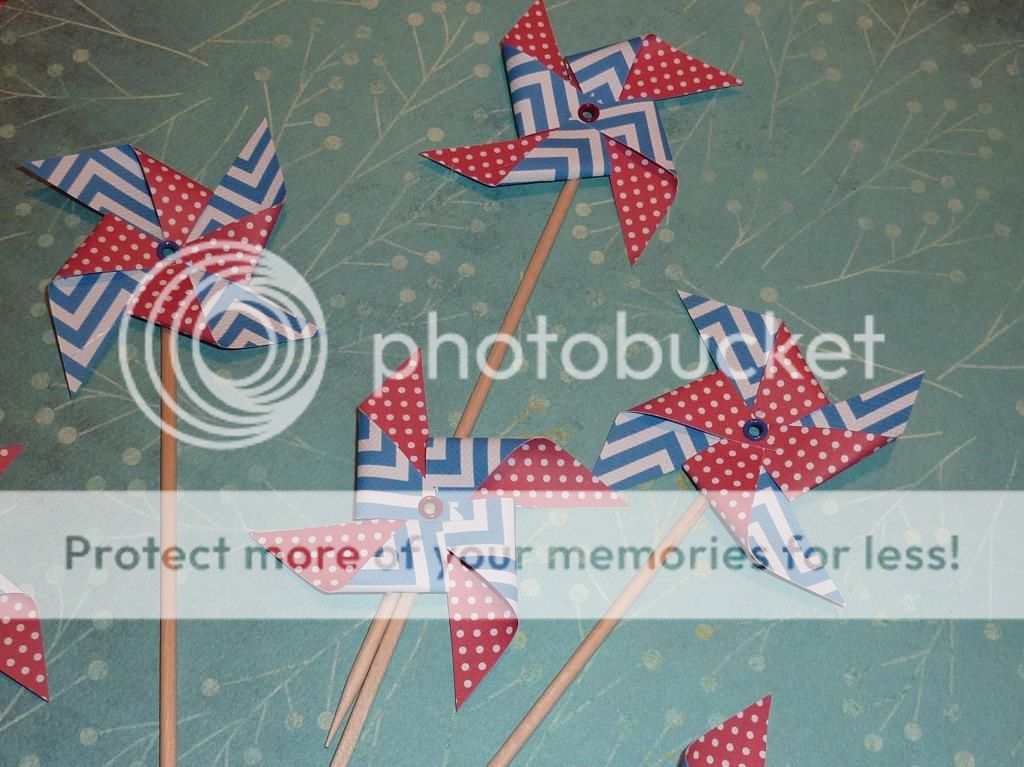
Some patriotic pinwheel cake toppers.
So simple, but festive and cute...


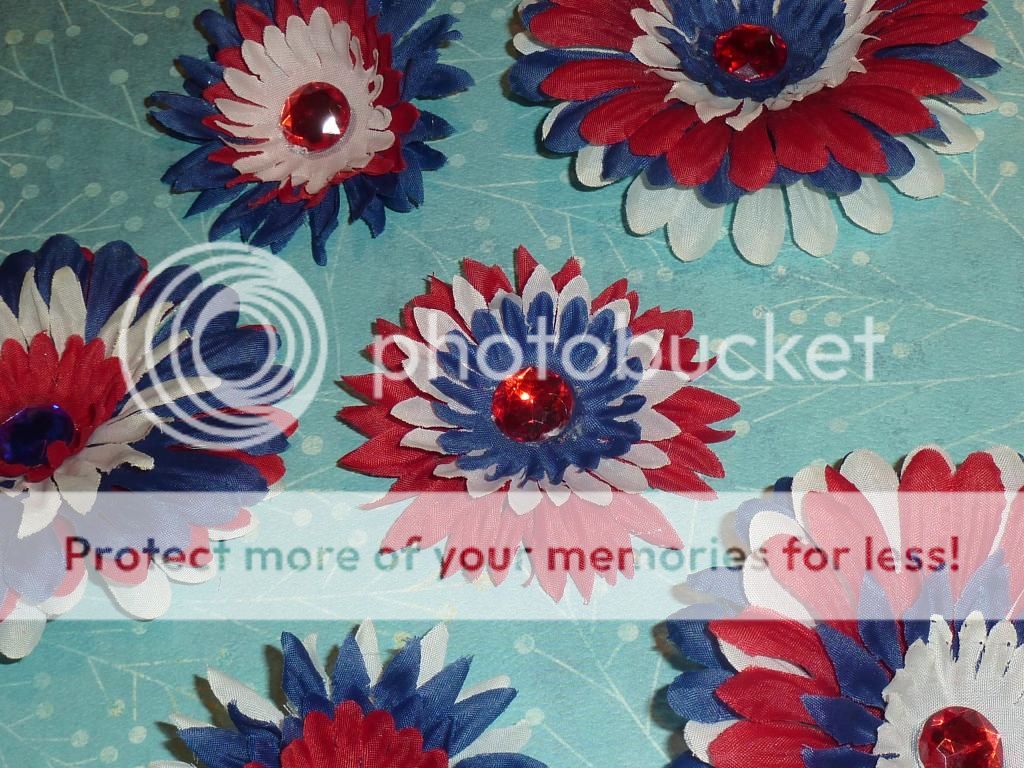
And some red, white and blue hair clips.
We just disassembled a bunch of plain flowers, and re-assembled them in colorful combinations.

Happy 4th of July!


Pin It

Friday, August 17, 2012

Flag Bouquet Birthday Card

Pin It


Just a simple card, using toothpicks and paper scraps.

Since I don't have baker's twine, I twisted two pieces of embroidery floss together.

Easy, and fun to make...

Pin It

Tuesday, August 7, 2012

3D paper flower gift topper - tutorial

Pin It


This is a simple and easy way to create a pretty paper flower as a topper for a gift.

It's similar to tissue paper pom poms, but much easier and quicker.

You only need one sheet of tissue paper, or other thin paper,
for example book pages or sheet music.


1. Cut about 8 squares of paper and stack
2. Fold it double twice
3. Trim the corners as pictured, cutting scallops
4. Unfold
5. Staple the centers together with one staple
6. Pull up first layer and crumple
7. Repeat for each single layer
8. You're done!

That's all there is to it. Simple, right?!

They're fun to decorate gifts, or decorate whatever else you can come up with!

.

Pin It

Wednesday, July 11, 2012

Caterpillar Birthday Party

Pin It


It all started about a half year ago, when I spotted this cute party hat at our local $ store.

I really liked it, so it just had to come home with me.

Fortunately, a half year later I still remembered that I got it,
and even more important: where I put it!

A simple theme, and fitting for a one year old's birthday.
Which we happened to combine with our 7 year old girl's, 
who just had a project in her classroom where they watched caterpillars develop into butterflies.
(She had her 'own' party too, with some of her classmates.)

Since cake decorating isn't my forte,
I kept things simple.

I used M&M's to create caterpillars on cupcakes.
Used a toothpick and black frosting for the face, and sprinkles for antennas.

I put some cupcakes in a pie plate, and put colored icing on some of them to create one big caterpillar. 

I made this banner out of fabric.

No sewing at all, just a lot of hot glue...


I first assembled the caterpillars, by gluing fabric circles onto a strip of paper.
Drew the faces on with fabric paint, and used pipe cleaners for antennas.

Then I cut triangles, glued them onto a piece of twine, and glued the caterpillars on the pennants.

Simple and cheerful.


And some colorful favors...


(And for those of you who know us in real life:
yes, this post is way late, it somehow got stuck in my drafts...)

Pin It

Thursday, July 5, 2012

Fireworks

Pin It


 I hope everybody had a great 4th of July!


We thought watching fireworks over water doubles the fun.


It was so pretty!

Pin It

Friday, May 18, 2012

First Grade Birthday Party Ideas

Pin It

Our oldest turned 7, so we invited some of her classmates for a party.

I have the hardest time coming up with things to do, 
so in case there is anybody out there who recognizes that,
I will share what we did :)

MAGIC DRINKS

We started our party with "magic" Sprite and snacks.

I had put a drop of food coloring in the clear cups I used to server their drinks. (I did that ahead of time.)

I served them one by one, holding the bottom of the cup in my hand, so that they couldn't see it.

They were AMAZED to see that the clear Sprite turned into a colorful drink.

And even more amazed when the next ones turned into different colors.

Fun, but simple, and a great way to start a party.

(And yes, eventually they did figure it out, but it took a little while.)


After seeing several similar games online, I came up with the following game:

POM POM RACE


The things you need are pictured above.

Start with one bowl filled with pom poms.
The kids race the pom poms on the spatula to the other bowl, which is placed some distance away.
Give them a certain amount of time to do it. (We did one minute, but you can try it yourself to see what time and distance is appropriate.)
They can't touch the pom poms with their hands, and anything they drop doesn't count
Then count the pom poms in the other bowl.
The kid who managed to transfer most pom poms is the winner.


DECORATE PICTURE FRAMES

I had them decorate picture frames:

I painted them in girly colors beforehand,
and had them decorate it with glitter glue, flower sparkles, paper punch-outs, etc.


TREASURE HUNT

And, they went on a Treasure hunt.


I wrote on the lid of a disposable cake pan with Sharpies,
and put sparkly stuff inside.


I hid envelopes throughout the house, containing hints where the next envelope would be,
and the last one pointing to the treasure.
(Would have loved to do this outside, but the weather didn't cooperate.)

They were very excited about this game.


I had much more planned, but these things, combined with cake and opening gifts, were plenty.

Pin It

Thursday, August 18, 2011

Party food

Pin It

We have 2 birthdays in July. I have been wanting to post these pictures, but they're a little late. My husband's and daughter's birthday are only one day apart, and that usually results in us celebrating their birthdays together.


Although my hubby isn't picky, I tried to stay away from the typical pink girly party decorations and find something that would be cute for a little girl and a big guy :)

This color theme seemed to work for both of them.


I found some free printables that I really liked.

I used the printable Lots-o-dots to make the cupcake toppers. On the same site, there is also a printable mini banner. Both printables are so cute. I used the dots to make the round cupcake toppers, I printed them on textured cardstock, punched them out and attached them to short skewers. I used the banner printable to make the little flags.


After I was done making the flags, I had some extra pieces, so I also made a little banner and used that to decorate our ice cream cake.
(Recipe can be found here.)


Since a couple of my girls' cousins couldn't be at the party, we had another little party. 
This time it was a tea party, and I enjoyed making small treats: chocolate covered strawberries, mini chocolate cookies, mini cupcakes, heart shaped cheese & crackers, and I added some chips and watermelon. Just some small kid-friendly treats, that could also be enjoyed by the moms.

Since it was really hot, we had ice tea instead of hot tea, and strawberry lemonade. 


Pin It

Sunday, June 12, 2011

Flower Party

Pin It

With a newborn in the house, I am sort of behind with pictures, but just thought I'd share some pictures to show what we did at the birthday party we had for our oldest!


Some cupcakes for her classmates and our family birthday party...


And different ones for the kids' party...


Party favors  


With tags that match these party invitations


More party favors that double as decoration


Little purses to decorate ...

with rubber stickers


 We made our own party leis...


with flowers I punched out of tissue paper with my BigShot and straws...

Pin It

Monday, May 9, 2011

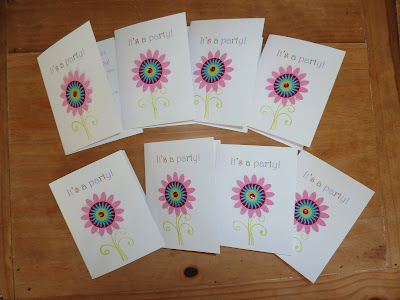
It's a party - Party invites

Pin It


Although we have celebrated a lot of birthdays at our house, this one is a first for me and my 6-year old:
a birthday party with only Kindergarteners. 

They are all girls, and my daughter and I decided to go for a flower-theme again.

I kept the invites pretty simple, by printing the text on the front and the inside, and then used a stamp for the stem and punches to make the flowers.

Simple but sweet...

Pin It

Friday, September 10, 2010

Bead Cup Tutorial

Pin It

I was washing some clear plastic cups to put in our recycling bin, but then it occurred to me that I could use them for a cute little craft. So instead of throwing them away, I kept them.

Today I made them a lid and filled them up with beads. These make cute party favors, or work nice as little gifts on a trip, or when your little girl is sick.

I have a shoebox around that I fill with little gifts and fun things like this, and things I find at the dollar store. When the kids are sick, or when we go somewhere where they need to be entertained, all I need to do is get something out of that box. It works great!

Anyway, back to the bead cups! I made these bead cups and took some pictures during the process. Have fun!
The containers I used were empty containers from Crystal Light and yogurt.
Basically any small clear container with a flat edge on top works.
Wash and dry the containers thoroughly.
Some of them may have an expiration date printed on them, make sure you remove that too.
Trace the top of the container onto cardstock.
Fill the container with beads. I put bigger beads (for smaller hands) in the big cup, and small beads in the small Crystal Light cup.
Then, I added some pipe cleaners to the big cup, and different lengths of wire to the small cup. I found that pipe cleaners work GREAT for little kids. Once the bead is on there, it doesn't tend to slide off so easily.
Next, I decorated the cardstock circles I cut.
(Wait to put on the rhinestones, or other bulky embellishments, you'll see why.)
I used Elmer's white school glue to attach the lids to the cups.
I found that it helped to put the cups upside down while drying, to make it stay in place.
In order to do that, I had to peel off the rhinestones I already attached in the picture above.
So that's why you had to wait on those!

And there is your adorable little gift!


I linked up to:
It's a Blog Party Show and Tell Green Join  us Saturdays at tatertotsandjello.com for the weekend wrap up         party!

Pin It