It is very quick, simple and fun.
And, you don't need a lot of supplies either.
So, let's start!
And, you don't need a lot of supplies either.
So, let's start!
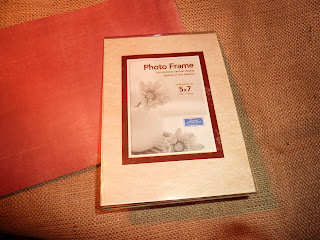
 I used a simple plastic 5x7 frame from the Dollar Store.
But you can adjust this to work for any size frame you like.
Other supplies needed:
- Dry Erase Marker
- Background paper, same size as frame
- Burlap, a little smaller than frame (Or other paper. Make sure it is light enough that you can see the text you write on it with a dry erase marker.)
- Other patterned paper, flowers, ribbon, rhinestones, what ever you can come up with to decorate the frame
- Adhesive (Glue dots)
 Begin by trimming the background paper.
Just cut it the same size as the paper that was in the frame when you bought it.
 Next, cut the burlap a little smaller than the frame.
Then, pull out some pieces of burlap to create a fringed edge all the way around.
 Now the fun part begins.
Decorate the background with patterned paper, ribbon, etc.
Just make sure that you keep the 'bulky' parts, like flowers, rhinestones, etc. out.
You will glue these on top of the actual frame, not on the background.
Other things you could use are:
* fabric
*lace
*buttons
*beads
etc.
 Put the background paper in the frame, and adhere the bulky items to the frame.
I really like to use mini glue dots, they seem to hold up pretty well!
 To make sure you will have your dry erase marker always handy, you could use a marker with a magnet in the lid, like the one pictured. Just glue a magnet on the frame, and you will have a place to keep the marker!
This works great to leave little messages for people
(or yourself, if there is something you don't want to forget)
Also, this is something that kids would enjoy to make, too.
They can just pick their own papers and decorations, and use it to draw on.
(Or leave messages for you.)


10 comments:
I just made a burlap dry erase board this week too! Yours is much more decorated than mine.
I am a huge fan of burlap. I love to incorporate it on the purses and bags I make. It is amazing what you can do with it. You are very clever to make a dry erase board with it. Cute.
I made one of these frames too, but not with burlap. Aren't they great?!
~JILL @ envirocraftiness.blogspot.com
Just a quick note to let you know that a link to this post will be placed on CraftCrave today [23 Jun 02:00pm GMT]. Thanks, Maria
How cute! I love projects that you don't need a lot of pricey materials for! I just found your blog from Blue Cricket and will definitely be back!
D'oh! I kept trying to figure out how the burlap would let loose of the dry erase marker!! And then I learned to read. Well done! Very cute! Thanks for sharing ... please come again to my Perpetual Link Party!
Oh I love this idea! I'm a huge "list" person, and I have dry-erase boards, cork boards, and planners scattered all over my house. I could always use more, thanks!
nice idea!
What a great idea! I never knew you could use burlap as a dry erase board.
Thanks so much for linking up to Scraptastic Saturday!
Hannah @ http://youngancrafty.blogspot.com/
This is so cute! I just bought some burlap to make little bags to hold chalk for chalk boards that I made for my grandkids. I have some left over, think I will have to try this to. So cute. Thank you for sharing.
Linda
Post a Comment